

 Terra Pulse Technical Team
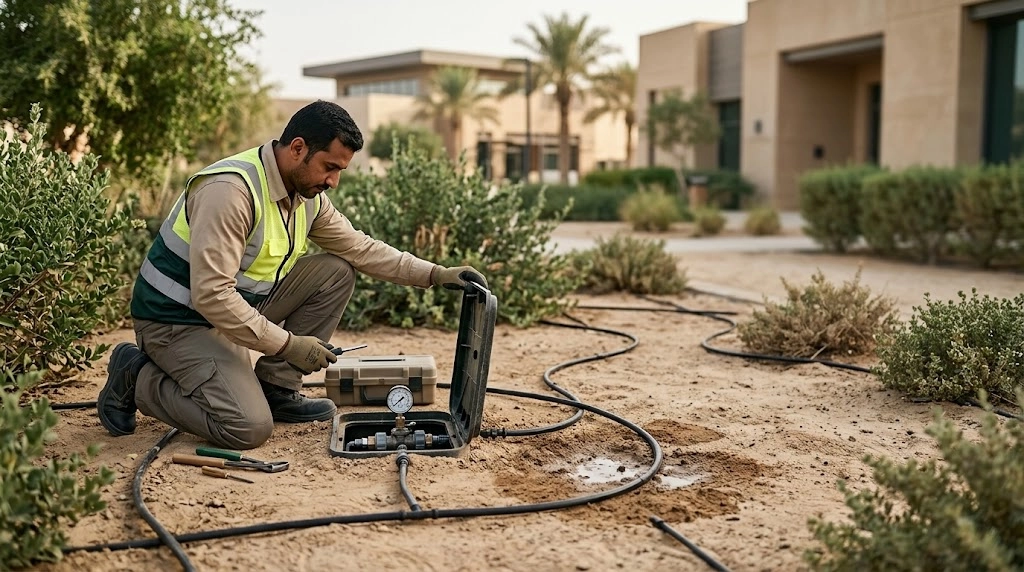
For gardens and landscaped facility grounds in Saudi Arabia, good maintenance supports water delivery to the root zone, consistent distribution and fewer recurring faults. This guide provides a practical approach to inspecting drip and sprinkler systems, diagnosing hydraulic and electrical problems, and organising routine checks. The work can be coordinated with a site’s wider landscaping and irrigation system requirements.
What does irrigation system maintenance include?
Irrigation system maintenance includes inspecting the water source, pump, filters, pressure regulators, valves, pipes, and drip emitters or sprinklers; cleaning and adjusting components; repairing defects; and checking pressure, flow and water distribution afterwards. For automatic systems, it also covers the controller, sensors, wiring and irrigation programme.
Three questions help establish whether maintenance has achieved its purpose: Does water reach every required area? Are components operating within their specifications? Does flow stop when demand ends? Recording the system’s condition while it is working correctly creates a baseline for later comparisons. [1]
How do drip, sprinkler and automatic irrigation maintenance differ?
For drip irrigation, inspection focuses on filtration, emitters, line ends and flow from sampled outlets. For sprinkler irrigation, checks cover nozzles, pop-up height, rotation, arcs and overlapping coverage. Automatic irrigation describes a control method that can operate either drip or sprinkler equipment; it adds programme, electrical and sensor checks to mechanical maintenance.
When defining a maintenance visit, agree which zones will be tested, which readings are required, what replacement parts are included and how results will be recorded. Checking the controller alone does not establish the condition of all the pipework.
What signs indicate a fault in an irrigation system?
A problem may appear in the plants, soil, components or consumption records. Look at its pattern: one affected plant points the inspection towards its outlet and immediate surroundings, while dryness along an entire line or zone calls for checks of shared components. Yellowing or wilting also requires a plant-health assessment, since adding water can make some problems worse. [2]
| Symptom | Possible causes to investigate | Where to start |
|---|---|---|
| Weak performance across all zones | Supply, pumping or a shared component restricting flow | Readings at the source, pump and filter during operation |
| One weak zone or a weak line end | Leak, restriction, valve fault or excessive demand | Compare the start and end of the zone and inspect the route |
| Wet patch or unusually high flow | Broken fitting or pipe, or a missing outlet | Isolate the zone and trace wet areas and flow |
| Scattered emitters with no flow | Clogging, a kinked line or a local outlet problem | Review filtration and collect flow samples |
| A sprinkler will not rotate or rise | Nozzle, internal filter, pressure or component damage | Compare neighbouring sprinklers, then inspect the affected unit |
| Water after irrigation stops | Low-head drainage or a valve passing water | Observe whether flow subsides and check the zone valve |
| Repeated cycles or failure to start | Settings, sensor, power or valve-circuit problem | Save the programme, then test the zone from the controller |
This table identifies a starting point for diagnosis. Photograph the symptom while it is present, record the zone number and operating time, and note any excavation, planting or repair work that preceded it.
What is the difference between preventive maintenance and fault repair?
Preventive maintenance checks performance before service is interrupted. It includes reviewing filters, readings and programmes, and inspecting outlets. Corrective maintenance deals with a fault that has already appeared, such as repairing a break or replacing a valve solenoid confirmed to be defective. Emergency maintenance begins when substantial water loss must be contained or the site needs protection from accumulating water.
For example, cleaning a filter when its service indicator requires it is preventive work. Cleaning the same filter after a zone stops working is corrective work, followed by an investigation into why the dirt loading went unnoticed. If each visit ends with replacing the same emitters, the maintenance plan needs to address water quality, filtration and flushing so that repeat repairs do not become a substitute for tackling the cause.
How should you inspect an irrigation system systematically?
Prepare the system information and measuring tools
Obtain the as-built drawing or sketch a simple layout showing the water source, pump, filters, valves and zones. Gather component model details, fault records and the latest programme changes. Depending on the task, inspection equipment may include a suitable pressure gauge, access to flow-meter readings, a graduated container and timer, sprinkler catch cans, cleaning tools and matching spare parts. A technician selects the electrical instruments appropriate to the control system.
Work from the source to the zone and then the outlet
- Record the existing condition: photograph the fault and save the irrigation programme before changing it.
- Check the source: confirm water availability, isolation-valve positions and pump discharge conditions.
- Run an identified zone: allow operation to stabilise, then record pressure and flow.
- Trace the performance loss: move from shared components to the affected zone, line and outlet.
- Test one diagnosis: carry out the appropriate action, repeat the measurements and record the change.
Before dismantling a filter, valve or sprinkler, isolate its water supply and release pressure. Isolate electrical supplies before electrical work; circuit measurements and diagnosis remain the responsibility of a competent technician. Restore water gradually in accordance with the operating procedure. [6] [16]
What causes low irrigation pressure, and how do you locate the problem?
Distinguish static pressure from operating pressure
Static pressure is measured with no flow at the measurement point. Operating, or dynamic, pressure is measured while water moves through the operating system. A satisfactory static reading can fall when irrigation starts, so a reading taken with the system closed is insufficient to assess sprinkler performance. Compare operating pressure with the requirements of components at their actual locations. [12]
Diagnose the problem according to the area affected
- All zones are weak: review the supply, pump, main valve and shared filtration.
- One zone is weak: check that its valve opens correctly, then inspect its regulator, leaks and missing outlets.
- The line starts well but ends poorly: investigate kinks, blockages, pipe length, friction losses, elevation differences and demand along the line.
- Performance declined after an extension: compare the added outlets and their flow requirements with the previous zoning and available supply.
Address the confirmed finding: clean a component restricting flow, repair a leak, restore proper valve opening, or review zone division when demand exceeds supply. A pressure-reducing regulator cannot raise low inlet pressure, and increasing pump capacity requires technical assessment before it is approved. [3] [17]
Why do excessive pressure and water hammer cause recurring faults?
Signs of excessive pressure include sprinkler spray turning into fine mist, outlets being forced out of position, or recurring leaks at connections. Check operating readings, the regulator and component limits. Higher pressure can increase losses and affect distribution rather than improve it. [3] [12]
Water hammer is a sudden pressure change associated with a change in water velocity. It may be heard as knocking when the system starts, changes zones or closes. If it recurs, record when the sound occurs and review filling procedures, valve sequencing, controls and pumping. The system may need a technical adjustment to its controls or protective measures; select the solution after assessment, and avoid sudden opening when restoring the water supply. [16]
How do you detect and repair irrigation system leaks?
Check visible leaks first, then narrow down buried leaks
Run the zone and inspect connections, line ends, sprinkler bases and valve boxes. Mark locations where water escapes from a pipe or appears through the soil, and compare zone flow with its baseline under the same conditions. A dedicated irrigation meter helps distinguish system consumption. With a shared meter, other demand must be isolated or accounted for. [5] [6]
For a buried leak, use the drawing, isolation valves and measurements to narrow the area before a specialist selects the appropriate detection method. A wet patch alone does not establish the break location, as water may travel through backfill before surfacing. Review buried services before excavation.
What is the repair sequence for a fitting or damaged pipe section?
- Isolate the area and identify the pipe material, diameter, pressure rating and fitting type.
- Expose enough of the pipe to inspect the extent of damage and the condition of its ends.
- Replace the damaged section using compatible materials and jointing methods. Observe any required setting or curing time.
- Carry out appropriate cleaning and flushing to prevent repair debris from entering downstream components.
- Restore operation gradually and check joint tightness and zone performance before backfilling and reinstating the surface.
Hypothetical calculation: a measured leak of 2 litres per minute lasting one hour loses 120 litres. Calculate losses using the actual duration of leakage: a leak may occur only during irrigation, or persist on a pressurised main. Recording flow and duration helps prioritise the repair.
Does water flowing after irrigation stops always indicate a leak?
Two different conditions need to be distinguished. The first is residual water draining through the lowest sprinkler in a zone. Flow decreases and eventually stops once the connected pipework has drained. A compatible anti-drain check valve suited to the elevation difference may be appropriate. The second is water passing through a closed zone valve, where a sealing problem allows the supply to continue. A check valve at the sprinkler will not repair that valve fault. [13]
To diagnose the condition, observe how long flow continues and whether it subsides after shutdown, and locate the sprinkler relative to the rest of the zone. Then check the closing command and zone-valve condition. Standing water in a valve box also requires its source to be identified: a leaking connection, a leaking valve body, or water entering from the surrounding area.
Why do drip emitters clog, and how should you deal with them?
Clogging agents fall into three groups: physical particles such as sand and silt, chemical deposits formed from constituents in the water, and biological growth such as biofilms, bacteria and algae. More than one cause may be present. A filter that captures particles of a particular size does not remove every dissolved substance or prevent all internal biological growth. [4]
Measure flow before judging an emitter
First check that the line is not kinked and water reaches it. Then compare outlets at the beginning, middle and end of the line, including both healthy and affected areas. Collect water from each emitter over the same time, recording sample volume, location and pressure where possible. These samples support diagnosis; assessing the whole zone requires an appropriate sampling layout.
Hypothetical measurement: if an emitter delivers 100 millilitres in 3 minutes, its flow is 100 ÷ 1,000 × 60 ÷ 3 = 2 litres per hour. Compare the result with the emitter specification at operating pressure. Pressure-compensating emitters may maintain stable flow only within their specified operating range. [17]
Address the clogging cause and retest the sample
Clean and inspect the filter, flush the line using the appropriate procedure, and service cleanable emitters or replace damaged ones with matching specifications. Do not enlarge an emitter opening with a needle to bypass a blockage, as that can change its flow. If the problem recurs, review deposit samples and water analysis before selecting any chemical treatment. [2] [4]
How do you clean irrigation filters and flush the lines?
Inspecting screen, disc and media filters
Start with the filter type, model and filtration grade required by the outlets. For screen filters, inspect screen integrity. For disc filters, inspect the discs, assembly and correct compression or closure. For media filters, follow the instructions for the filter media and backwashing. A filter can look clean while an assembly defect or bypass path allows unfiltered water through, so inspection also includes seals and internal components.
Compare inlet and outlet pressures at stable flow. An increase in differential pressure from the clean-filter baseline calls for service at the manufacturer’s specified limit. After isolation and depressurisation, perform the permitted cleaning, reassemble the filter, then check for leaks and reread both pressures. For automatic filtration, test the backwash cycle, its command signal and valve closure afterwards. [1] [6]
The flushing sequence
- Review discharge points, the route taken by flushing water and filtration condition.
- Flush the mainline, submains and distribution lines, followed by drip laterals, in the system’s prescribed order.
- Divide flushing into groups that achieve the required flow. Opening all line ends together may reduce the velocity needed to carry debris out.
- Observe the water and deposits, and follow the component-specific flushing velocity, duration and procedure.
- Close the ends, restart the zone and compare pressure, flow and emitter samples.
Opening a line end for a fixed time does not ensure debris removal if flow is insufficient. Hydraulic flushing alone may also fail to remove chemical scale or firmly attached biological growth. In those cases, select treatment after identifying the cause. [1] [2]
How do you repair sprinkler faults and uneven water distribution?
A sprinkler will not rise, rotate or spray in the correct direction
- It does not pop up fully: compare zone pressure, and inspect soil or grass around the body and water leaking at the unit.
- It rotates slowly or stops: inspect the nozzle, internal filter and operating pressure. A gear-driven rotor may need replacement if the fault remains after appropriate servicing.
- The arc or direction is incorrect: adjust it using the tool and procedure specified for that model, then verify coverage.
- The nozzle is missing or worn: fit a compatible type, size and application rate, then test the zone.
Dismantle components after isolation and depressurisation, keeping soil out during servicing. Also review obstructions, plant growth, and compatibility between sprinkler bodies and nozzles. Arbitrarily mixing parts with different discharge characteristics can worsen uneven watering. [5] [14] [15]
Testing water distribution with catch cans
After correcting visible defects, arrange identical containers in a regular grid representing the area. Test in calm conditions over a known period long enough to collect a measurable amount. Record each container’s position and collected volume or depth. If neighbouring zones contribute to coverage in the test area, their contribution must be included. [15]
The resulting map identifies areas receiving less water. Review nozzles, overlap, pressure and obstructions, then repeat the test with the same layout after adjustment. Do not compensate for uneven coverage by extending the entire zone’s run time, since areas already receiving adequate water will also receive more.
How do you inspect irrigation valves?
A valve does not open or only opens partially
Check water availability, the isolation-valve position and any flow-control setting, then use the model’s prescribed operating test. If the valve opens using its permitted manual method but does not respond to the controller, the technician checks the signal circuit, connections and solenoid. Failure to open manually calls for checks of the water supply, internal passages, diaphragm and installation direction. [8]
A valve fails to close or allows water through
Confirm that the operating command has ended and any manual opening mechanism is closed according to the instructions. After isolating the water and releasing pressure, inspect debris at the valve seat, diaphragm condition, seals and passages. Clean or replace the damaged part, then test opening and closing more than once during handover. [7]
Record the valve model and solenoid type before ordering a part. AC, DC and latching-solenoid systems do not necessarily use interchangeable components, and a fault on one circuit does not establish that the entire controller has failed.
What are common irrigation pump faults, and how are they checked?
Assess the pump as part of its system: the suction source, inlet and discharge pipework, duty point, motor and protection arrangements. Low flow can relate to inadequate supply, a restricted suction line, air ingress, unsuitable operating conditions or wear. Identifying the cause requires measurements and equipment data. [9]
| Symptom | What to review | Required action |
|---|---|---|
| The pump runs but water delivery is weak | Source, suction, valves, pressure and flow | Hydraulic checks before changing capacity |
| The pump will not start | Start command, power, protection and source water level | Control and electrical diagnosis by a competent technician |
| Unusual noise or vibration | Suction conditions, cavitation, supports and component condition | Identify the cause and follow the protective procedure |
| Frequent starting and stopping | Demand, control settings, leaks and pressure-storage components where fitted | Review the operating pattern rather than repeatedly resetting controls |
For pumps requiring priming, follow their instructions; do not run them dry in an attempt to restore water. Servicing also covers leaks, supports and motor condition according to equipment type. Power-supply and panel work can be coordinated within MEP and electromechanical works where required. [6]
How do you maintain automatic irrigation and its controller?
Review the programme before dismantling components
Save the settings, then check the clock, date, watering days, start times, zone run times, seasonal adjustment and overlapping programmes. On some controllers, each start time launches the entire programme. Entering several start times in the belief that each belongs to a different zone can therefore repeat irrigation. The configuration method depends on the controller model. [10]
Use the difference between one failed zone and failure across all zones
- A zone works manually from the controller but not automatically: review the schedule, sensors and programmed delays.
- One zone does not respond: compare its circuit, valve, solenoid and connections with a working zone.
- No zones respond: review power, controller mode and shared components such as a master valve or pump command. Common-wire checks apply to conventional systems that use one.
- An error code keeps returning: record the code, zone number and time, then consult the controller manual instead of repeatedly clearing the error.
The technician measures voltage, continuity and resistance using suitable instruments and the manufacturer’s specified values. Rain, soil-moisture and flow sensors, where installed, are checked for readings, connections, location and configuration. Permanently disabling a sensor to force irrigation can conceal the cause and increase waste. [8] [10] [11]
How does water quality affect recurring irrigation faults?
Relate water-test results to the fault: suspended particles influence filtration selection, deposits require identification of their constituents and formation conditions, and biological growth requires investigation of its source and suitable treatment. If the supply changes or clogging recurs, choose a sampling plan and locations that help compare incoming water with deposits inside the system. [2] [4]
Clear-looking water can still contain dissolved substances, and elevated salinity alone does not identify the cause of clogging. Also assess whether the water suits the plants and soil, distinguishing this from a mechanical emitter fault. Where fertiliser or treatment chemicals are injected, review compatibility, injection equipment and backflow protection for the source.
Chemical treatment requires a specialist plan covering the substance, dose, injection method, flushing, water disposal and component compatibility. Do not mix acids and disinfectants indiscriminately or replace analysis with one cleaning recipe for every condition.
How do you adjust irrigation schedules after maintenance or seasonal changes?
First establish that the system operates correctly, then review plant type, growth stage, soil, root depth, sun and wind exposure, and rainfall. One fixed run time will not suit every city, season and zone. Where a site contains different plant types, review their grouping and each area’s requirements rather than increasing every zone’s duration to address one affected plant. [11]
- Record the existing programme and the reason a change is requested.
- Review water delivery, distribution and application rate before changing duration.
- Adjust the relevant area’s settings and monitor root-zone moisture and plant response.
- Where runoff occurs, review whether shorter watering cycles separated by soak periods are appropriate.
- Verify sensor operation and reassess the programme as weather and demand change.
If a plant appears drought-stressed while the surrounding root-zone soil is saturated, investigate plant health and drainage instead of automatically adding water. Correct sprinkler operation and the soil’s response to irrigation are complementary parts of the assessment.
What irrigation maintenance schedule can you start with?
The following is a proposed operating starting point for a landscape irrigation system. Adapt it to equipment instructions, water quality, operating hours and fault history. Service filters when their indicators or manufacturer limits require it, even if this falls before the scheduled date. Increase monitoring where performance changes rapidly. [1]
| Initial frequency or trigger | Tasks | Evidence of completion |
|---|---|---|
| During normal operating rounds | Look for breaks, wet areas, overspray and alarm messages | A fault record identifying the location, zone and photograph |
| Weekly as a starting point | Compare pressure, flow, filter differentials and selected outlet samples | Readings with units and operating conditions |
| Monthly as a starting point | Test zones, opening and closing, sensors and regulators; assess flushing needs | A checklist, findings and follow-up actions |
| When seasons change | Review the programme, weather, planting and coverage | A saved programme and reason for adjustment |
| After repairs, excavation or extended shutdown | Inspect affected components, clean appropriately and restart gradually | Post-work testing and comparison readings |
| At a planned annual review | Assess component condition, recurring faults, drawing accuracy and rehabilitation needs | A condition report and plan for the following year |
Assign each task an owner, due date and trigger for corrective action. At sites managing several systems, irrigation can be included within facility management, operation and maintenance to coordinate records, fault reports and spare-parts follow-up.
Which maintenance mistakes cause irrigation faults to return?
- Replacing parts before measuring: a sprinkler may be changed while low pressure affects its whole zone.
- Relying on static pressure: this can miss a pressure drop that appears only during flow.
- Extending run time to address poor coverage: this adds water to healthy areas without fixing the cause.
- Choosing a part only because it looks similar: different flow, nozzle or solenoid characteristics can alter performance.
- Restarting a repaired line without checking debris: the problem may move to downstream emitters or valves.
- Backfilling before testing: this makes connections harder to verify or repair again.
- Repeatedly clearing errors or disabling sensors: this removes useful diagnostic evidence.
- Closing a fault report without measured results: repair effectiveness and recurrence become harder to track.
Turn each recurring fault into a defined preventive action: who checks it, which reading or symptom triggers intervention, and what evidence confirms that the work is complete?
Post-maintenance irrigation inspection and handover checklist
Before accepting the work, test the repaired component and the zone it serves, and review its effect on shared equipment. Acceptance limits should follow the design, equipment specifications and agreed scope.
- Identify the zone number, fault location and cause established through inspection.
- Confirm replacement parts match the required type, size, flow and operating rating.
- Check for visible leaks at connections and components included in the work.
- Record pressure and flow under known operating conditions and compare them with the baseline.
- Verify restored water delivery to line ends and affected areas.
- Check sampled emitters or test sprinkler coverage, according to the task.
- Test valve opening and closing, including water behaviour after shutdown.
- Test the programmes, sensors and alarms covered by the maintenance scope.
- Close valve boxes, reinstate the site and update drawings if routes changed.
- Provide photographs, readings, programme settings, outstanding issues and the follow-up date.
A short repair record template
Zone: …… Symptom: …… Pre-work readings: …… Cause: …… Action and parts: …… Post-work readings: …… Outstanding issues: …… Technician and date: ……
Hypothetical case: zone pressure improves after filter cleaning, but three emitters still deliver too little water. Record the improvement at the shared component and continue investigating the affected outlets locally. Resolving the general symptom does not justify closing outstanding defects.
When is a repair sufficient, and when does the system need rehabilitation?
A local repair is appropriate when damage is limited and performance can be restored with a compatible part and a successful test. A wider assessment is warranted if breaks become widespread, clogging returns despite addressing its cause, planting layouts change, zone demand increases, or suitable parts become difficult to obtain.
Compare options by scope, cost and continuity of watering: a local repair, replacement of selected lines, filtration or control upgrades, or changes to zoning. Ask for an inventory of affected components and a phased transition plan that maintains irrigation during the work. System age is one assessment factor rather than a reason on its own to replace the whole installation.
What determines irrigation system maintenance costs?
Cost depends on the number of zones, pipe lengths, component types, fault location and accessibility. Potential items include inspection and measurements, leak detection, excavation, parts, electrical testing, surface reinstatement and post-work tests. A diagnostic visit differs from a defined repair or an ongoing maintenance contract.
Ask for inspection fees, labour, materials and civil works to be separated, with the number of visits, fault response, exclusions and acceptance method stated. Supply the facility location, approximate landscaped area, number of zones, irrigation type, fault photographs and latest available readings. A proposal identifying the cause, work and tests is easier to assess than an inclusive price that does not define what will be done.
Frequently asked questions about irrigation system maintenance
What causes low irrigation pressure?
Low pressure can result from inadequate supply or pump performance, a dirty filter, a leak, a valve that does not open fully, or excessive zone demand. Measure operating pressure and trace the change from the source to the line end. A static reading alone is insufficient to identify the cause.
How can I tell whether an irrigation system has a leak?
Look for persistent wet areas, water escaping at connections and increased zone flow. Test zones separately and compare them with baseline readings. If water appears after shutdown, distinguish residual drainage from a leaking zone valve. Narrow down a buried leak before excavation.
Why do drip emitters keep clogging?
Repeated clogging can result from particles, deposits or biological growth, combined with unsuitable filtration or accumulation in the lines. Inspect the filter, flush according to the system instructions and compare sampled emitter flows. If clogging returns, review water and deposit analysis rather than replacing emitters alone.
Why is sprinkler water distribution uneven?
Causes include unsuitable pressure, clogged or worn nozzles, tilted heads or heads that do not rise, obstructions, wind, and mismatched nozzles or coverage. Correct visible defects, then use a systematic catch-can layout to verify water distribution.
How do I know whether the controller is faulty?
Check the time, programmes and sensors, then test the zone from the controller. If it runs manually but not automatically, start with scheduling and sensors. If it does not respond, a technician checks power, the valve circuit, solenoid and water supply against the system manual before concluding that the controller has failed.
How often does an irrigation system need maintenance?
A starting plan can include normal operating rounds, weekly reading checks and monthly zone and component inspections, with seasonal and post-repair reviews. Adapt this plan to manufacturer instructions, water quality and fault history. Service filters when their specified indicators require it rather than waiting for the scheduled date.
When does an irrigation system need replacement or rehabilitation?
Request an assessment when damage becomes widespread, faults recur despite addressing their causes, planting and water demand change, or suitable parts become difficult to obtain. Compare local repair, phased upgrades and replacement using measurements, condition, cost and the effect of interrupted irrigation.
How are irrigation maintenance costs calculated?
Costs reflect system size, zone count, fault type, parts, accessibility, testing, excavation and reinstatement. Request a proposal separating diagnosis, labour, materials, visits and exclusions, and explaining how post-maintenance performance will be verified.
Conclusion: identify the cause, then verify the repair
Effective irrigation system maintenance connects the visible symptom with the fault location and measured results. Start by establishing whether the problem affects the entire system, one zone or one outlet. Distinguish supply, filtration, distribution and control issues, then address the cause and test it under comparable conditions. This makes cleaning, repair and replacement decisions clearer and reduces attempts to treat symptoms by simply increasing pressure or watering duration.
After performance is restored, maintain it through scheduled checks and records of readings, parts and programme settings. If a fault returns, use the history to adjust the plan or request a wider assessment. The practical objective is consistent water delivery to the required areas, responsive valves and controls, and evidence of the result of each maintenance task.
Discuss your site’s irrigation inspection and maintenance needs
If your facility experiences recurring leaks, weak zones or automatic irrigation problems, share the project location, system type, number of zones, fault photographs and available records with Terra Pulse. An inspection and maintenance scope can be discussed within our landscaping and irrigation services, with tasks and deliverables defined around site condition.
Contact Terra Pulse to discuss irrigation maintenance, or send site details and fault information on WhatsApp.
Technical references
The following English-language references include manufacturer guidance and university and public-agency publications. Diagnostic principles have been applied while keeping pressure limits, filtration grades and treatment procedures specific to the equipment model and site conditions. The calculation examples and repair case are illustrative, and the maintenance schedule is a proposed template for adaptation. Sources reviewed: 31 October 2026.
- Netafim — Drip Irrigation: Understanding the Basics; operation and maintenance
- Rutgers University — Drip Irrigation Inspection Checklist for Agriculture
- DIG — Micro Irrigation Maintenance and Troubleshooting FAQs
- Penn State Extension — Drip Irrigation for Vegetable Production
- EPA WaterSense — Sprinkler Spruce-Up
- University of Georgia — Drip Irrigation Checklist: Start-Up
- Hunter — Valves: Valve Not Closing
- Hunter — Valves: Valve Not Opening
- NSW Department of Primary Industries and Regional Development — Selecting an Irrigation Pump
- Hunter — Eco-Logic Troubleshooting Guide
- EPA WaterSense — Watering Tips
- Oklahoma State University — The Effects of Wind Speed and Water Pressure on Home Sprinkler Systems
- Hunter — Valves: Weeping or Leaking When the Valve Is Off
- Hunter — Residential Rotors: Rotor Stopped Rotating
- NC State Extension — Landscape Irrigation Auditing Made Simple
- Rain Bird — Spring Sprinkler Tune-Up
- Utah State University — Maintaining and Improving Irrigation Application Uniformity in Sprinkler and Drip Systems
